
The pH meter
You’ve finally bought a professional pH meter and shelled out a pretty penny for it, but don’t think the hard work is over—now it’s time to make the most of your purchase.
We know how important this measurement is throughout the entire brewing process, so it is essential that it be accurate!
So having a good pH meter isn’t enough—you also need to know how to use it properly.
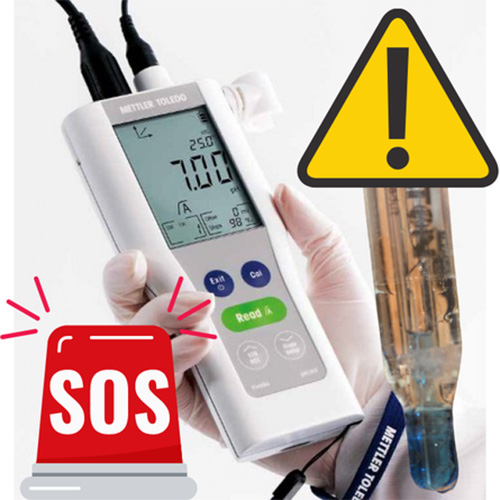
Why should you maintain your pH meter?
Buying a good pH meter isn’t enough—even though it’s a crucial step—to ensure accurate measurements, since low-quality pH meters, even when calibrated, can produce completely inaccurate readings.
Once you’ve made a good purchase, it’s important to ensure that your new instrument lasts as long as possible, and to do that, you need to perform proper maintenance on a regular basis.
How do you take an accurate measurement?
Let’s start right away with a topic that may seem obvious but is still seriously underestimated: how to take an accurate measurement with our pH meter. First of all, even though our SUPER pH meter is equipped with ATC (automatic temperature compensation), it’s absolutely essential to know that to take an accurate measurement, you must do so at the same calibration temperature of 20–25°C.
But if I bought a self-calibrating pH meter, why can’t I put the probe in the boiling wort?
- The compensation accounts for the temperature-dependent variation in the probe’s measurement, not for changes in the measured liquid (the dissociation of H+ ions will differ at 25°C compared to 80°C).
- Even though the probe is labeled as heat-resistant up to 100°C, the hotter you make it, the shorter its lifespan will be!
Another very important point is that the pH meter MUST be properly calibrated.
How to Perform a Proper Calibration
We cannot tell you exactly how to calibrate your instrument because every one is different, so the best advice is to READ THE INSTRUCTIONS to fully understand the procedure.
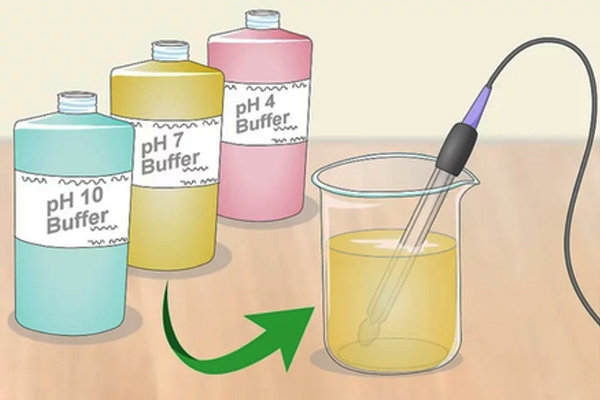
Here are the techniques and tips that I can tell you apply to all instruments:
- Always choose COLORED calibration solutions; this will allow you to detect changes in the solution’s pH, as the color is specifically designed to indicate whether microbiological changes have altered the pH of your buffer solution. Additionally, with colored solutions, you’ll make fewer mistakes.
- Never dip the pH meter probe directly into the original bottle of pH solution, as this could contaminate it and force you to buy a whole new bottle
- Make a small jar with a little solution and replace it often
- Between measurements, rinse the electrode with drinking water (NOT deionized water) and dry it with TOILET PAPER (which is different from a large roll of paper towels) or with a special antistatic laboratory wipe.
Maintenance
You must clean the electrode in the following cases:
- Long stabilization times
- Incorrect measurement values
- Calibration difficulties
Note: Our pH meters often feature quality indicators measured in mV, which tell us when it is time to perform maintenance.
Proper maintenance enables quick measurements, improves accuracy, and extends
the electrode’s service life.
Regular maintenance of the electrode includes storing it in the recommended storage solution between measurements, checking the electrolyte level, and topping it off if necessary.
The electrode performs best when the diaphragm does not dry out. How often the electrode needs to be cleaned depends on the nature of the samples.
An effective cleaning solution acts selectively on contaminants specific to the electrode. Grease, lubricants, and oils are removed using nonionic cleaning agents or ethanol; proteins, such as those found in food, are eliminated using an acidic pepsin solution, while an acidic solution is used to dissolve mineral deposits.
The table below will help you choose the correct cleaning product. Finally, rinse the electrode thoroughly with distilled water and store it in the recommended
storage solution.
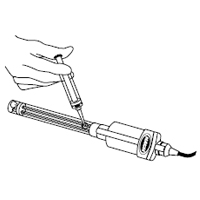
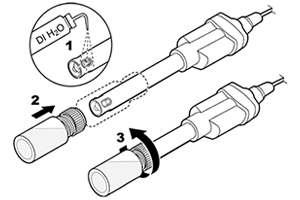
Top up the electrolyte
Rechargeable pH probes are equipped with an opening through which electrolyte can be poured. The electrolyte level depends on the specific application.
If there is sufficient electrolyte in the electrode (up to about 3 mm below the fill port), the hydrostatic pressure ensures an adequate flow of electrolyte through the diaphragm. This also prevents the sample solution from entering the electrode.
Leave some space below the filling port to prevent leakage or crystallization of the KCl. Open the filling port before each measurement and close it if the electrode is no longer in use and needs to be stored.
Removal of the electrolyte
Electrode Storage
If the electrode is stored in water instead of 3M KCl storage solution, the slope will become very low within a few weeks, and the electrode will no longer provide a reading.
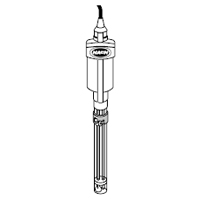
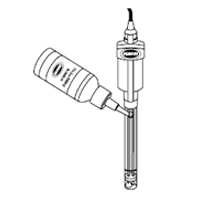
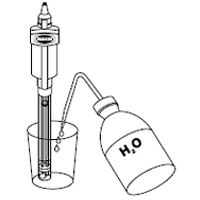
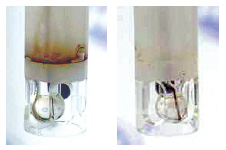
For short-term storage, the probe may remain in the sample for up to 2 hours, provided the sample’s pH is not high. Place the immersion bottle containing the storage solution over the probe when not in use. Refer to the figure on the right.
Hold the probe upright with the sensor and reference junction below the liquid level in the immersion bottle. If necessary, add preservative solution to the immersion bottle.
The issues
Crystallization
Electrode rinsing
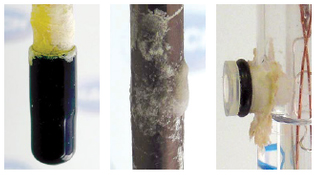
External contamination
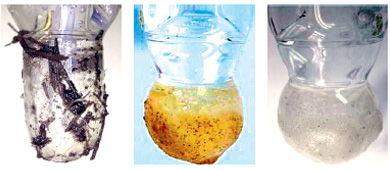
The presence of contaminated samples or sample residues on the glass bulb can lead to incorrect results. The table BELOW helps you choose the correct cleaning product. To clean a contaminated glass bulb on an electrode, generally proceed as follows: place the electrode in an electrode cleaning solution for up to sixteen hours (overnight).
Then rinse thoroughly with distilled water and place the electrode in a buffer solution with a pH of 4.0 for another twenty minutes.
Internal contamination

KS410 Thiourea Solution
The various solutions